How Do I Add a New User To My WordPress Website?
Article
Want To Excel on the Web?
Welcome to the world of WordPress user management! If you’re running a WordPress website for your business, understanding how to manage users effectively is key. It’s not just about adding names and email addresses; it’s about empowering people with the proper access to make your site thrive.
Think of your WordPress site as a bustling office. Just as in any office, different people have different roles and responsibilities. In WordPress, these roles range from Administrators who have full access to your site to Subscribers who can only manage their profiles. Getting these roles right is crucial for the smooth operation of your website.
In this guide, we’ll walk you through everything you need to know about creating users in WordPress. Whether you’re looking to add a new team member as an Editor or you need to grant developer access for technical tweaks, we’ve got you covered. Let’s dive in and unlock the full potential of your WordPress site through effective user management.
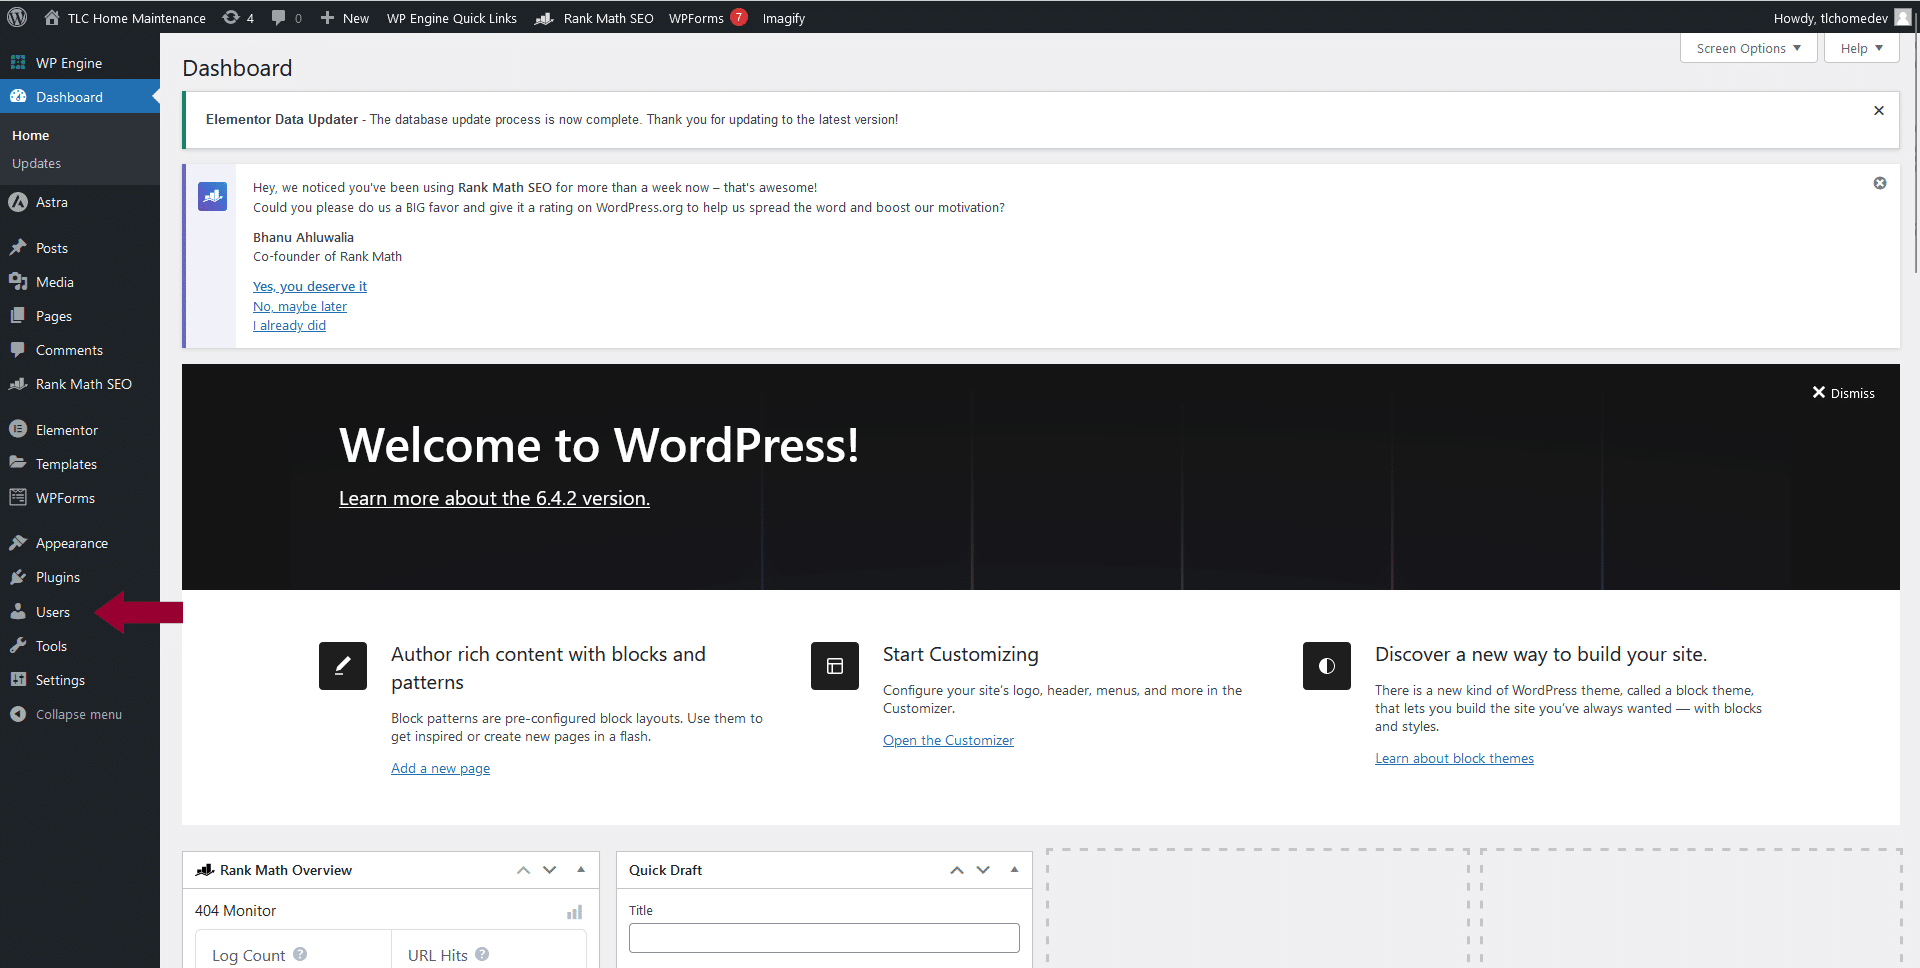
Understanding User Roles in WordPress
Let’s talk about user roles in WordPress, which are essentially the backbone of managing your site effectively. Each role is tailored to different responsibilities, ensuring your team can work together smoothly while keeping your site secure.
At the helm, we have the ‘Administrator’, akin to the CEO of your website. They have the keys to every room and the power to make significant changes. Administrators can add or remove users, change themes, modify plugins, and alter settings. It’s a role that carries significant responsibility and is usually reserved for site owners or trusted senior team members.
Next in line is the ‘Editor’, much like a department head, overseeing all content-related aspects. Editors can publish, edit, or delete any posts and pages, including those created by others. They ensure that every piece of content aligns with the site’s overall vision and quality standards.
‘Authors’ are your specialized team members or content creators. They have the autonomy to write, edit, and publish their posts and manage comments on them. Authors focus on creating compelling content while adhering to the guidelines set by the Editors.
‘Contributors’ are similar to interns or junior staff in your office. They can draft and manage their posts but need approval from higher-ups — the Editors or Administrators — to publish their content. This role is perfect for guest contributors or less experienced team members who are still learning the ropes.
Lastly, ‘Subscribers’ are like the visitors to your office. They have the least access, primarily there to observe and interact minimally. Subscribers can read content and manage their profiles but don’t have any publishing or editing capabilities.
By understanding these roles, you can delegate responsibilities on your website effectively, ensuring everyone has the necessary access without compromising your site’s security.
Step-by-Step Guide: Adding a New User
Step 1: Accessing the User Management Area
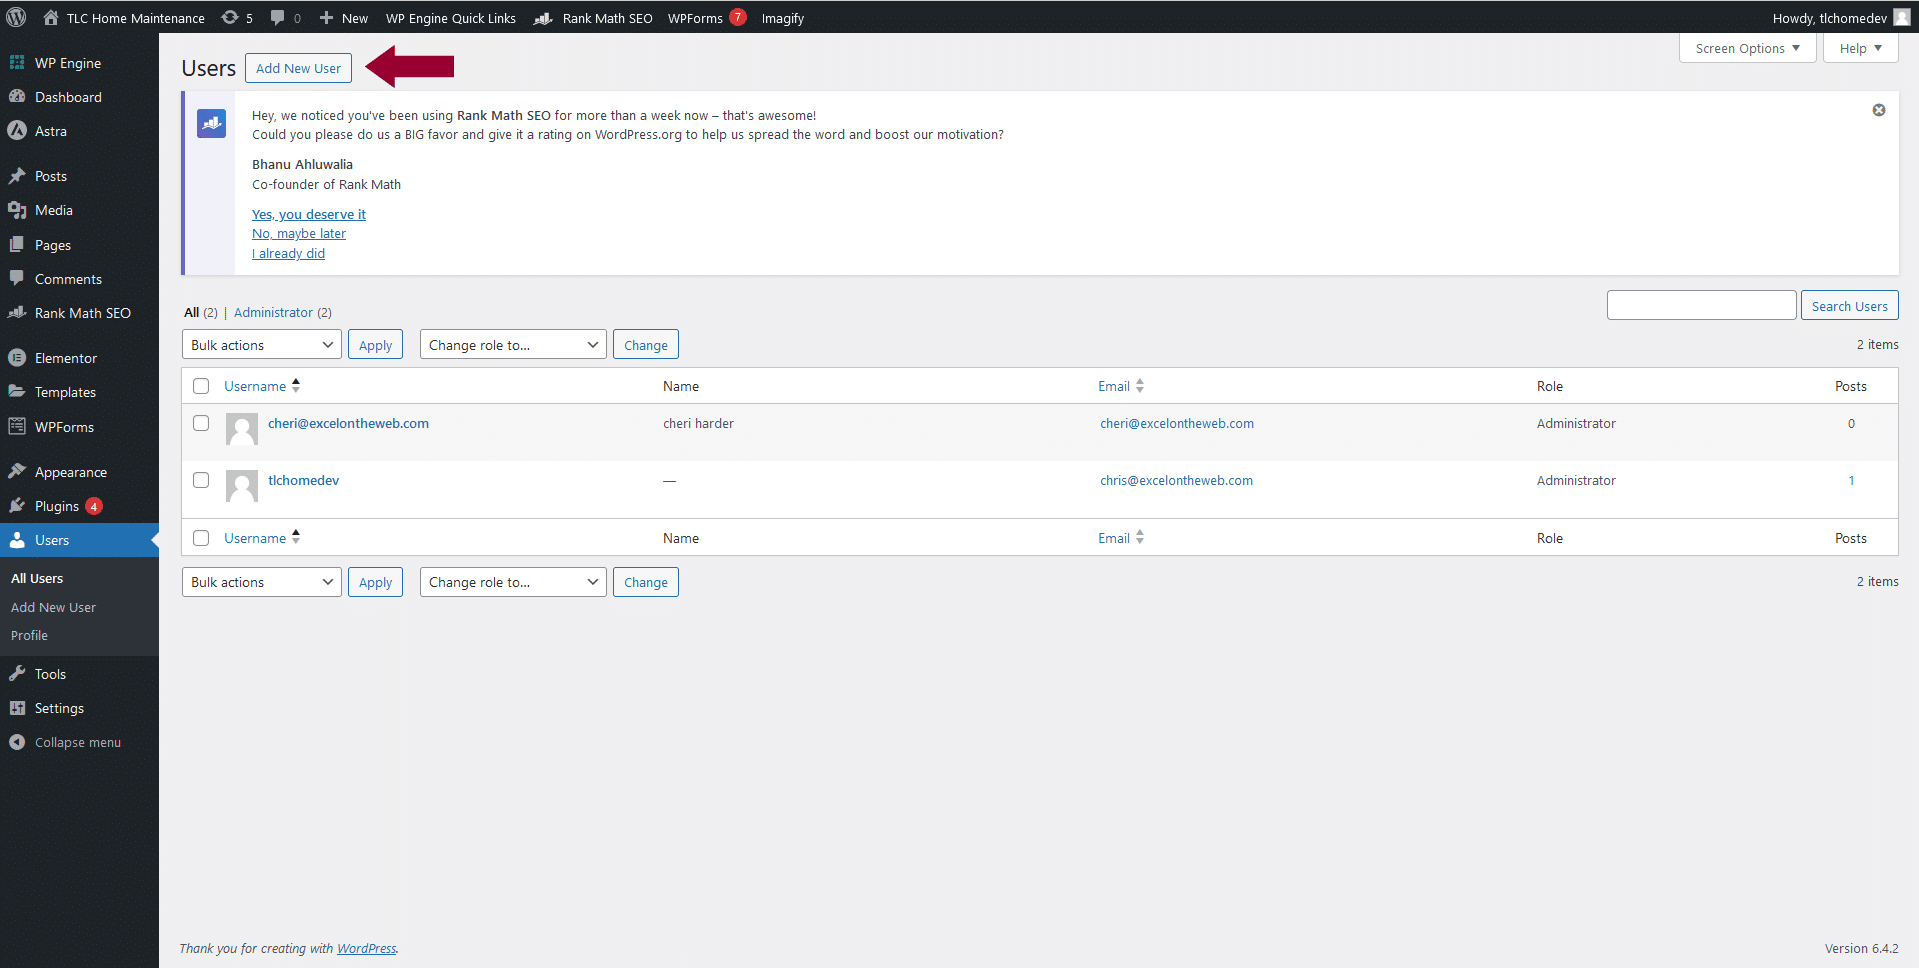
Step 2: Adding a New User
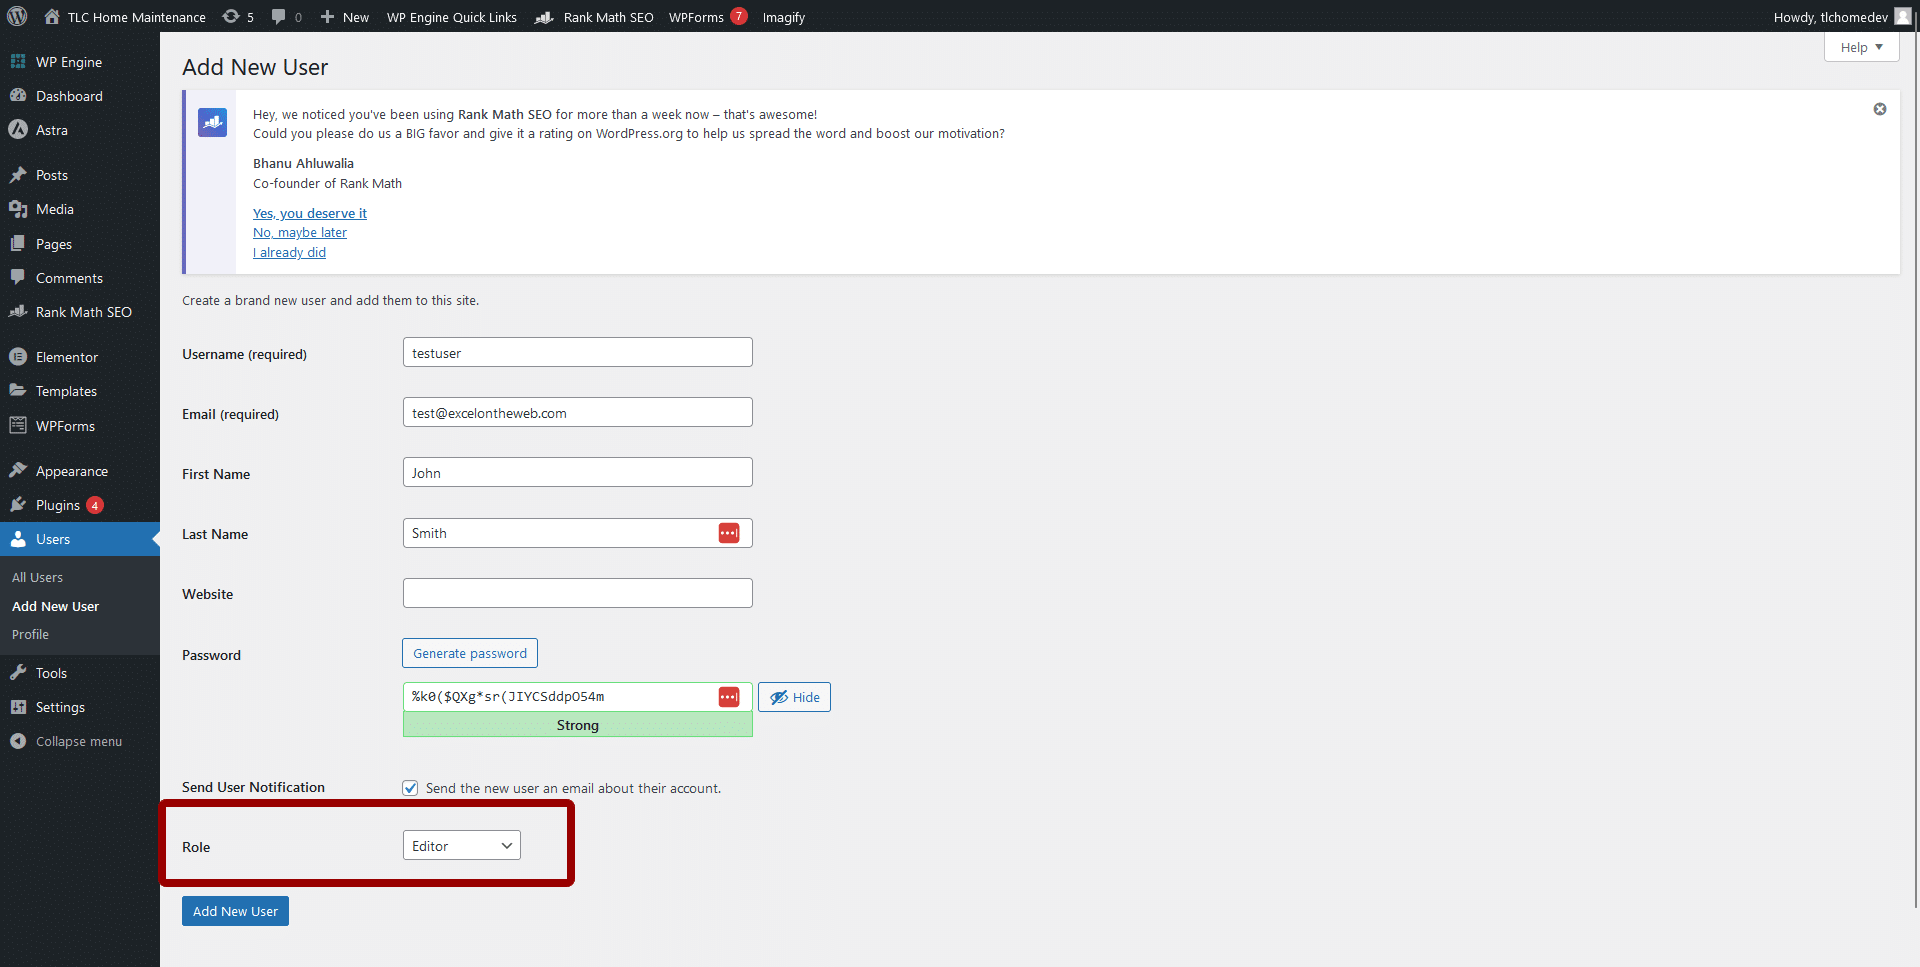
Step 3: Filling in User Details
You’ll need to fill in several fields:
- Username: Choose a unique username for the new user. It’s their identity on your site, so make it recognizable.
- Email: Enter the user’s email address. It’s crucial for their account management and notifications.
- First Name, Last Name (Optional): Adding these helps personalize their profile.
- Website (Optional): If they have a website, you can link it here.
- Password: WordPress will generate a strong password automatically. You can use this or create your own. Make sure it’s secure!
- Send User Notification: You can choose to send the new user an email about their account.
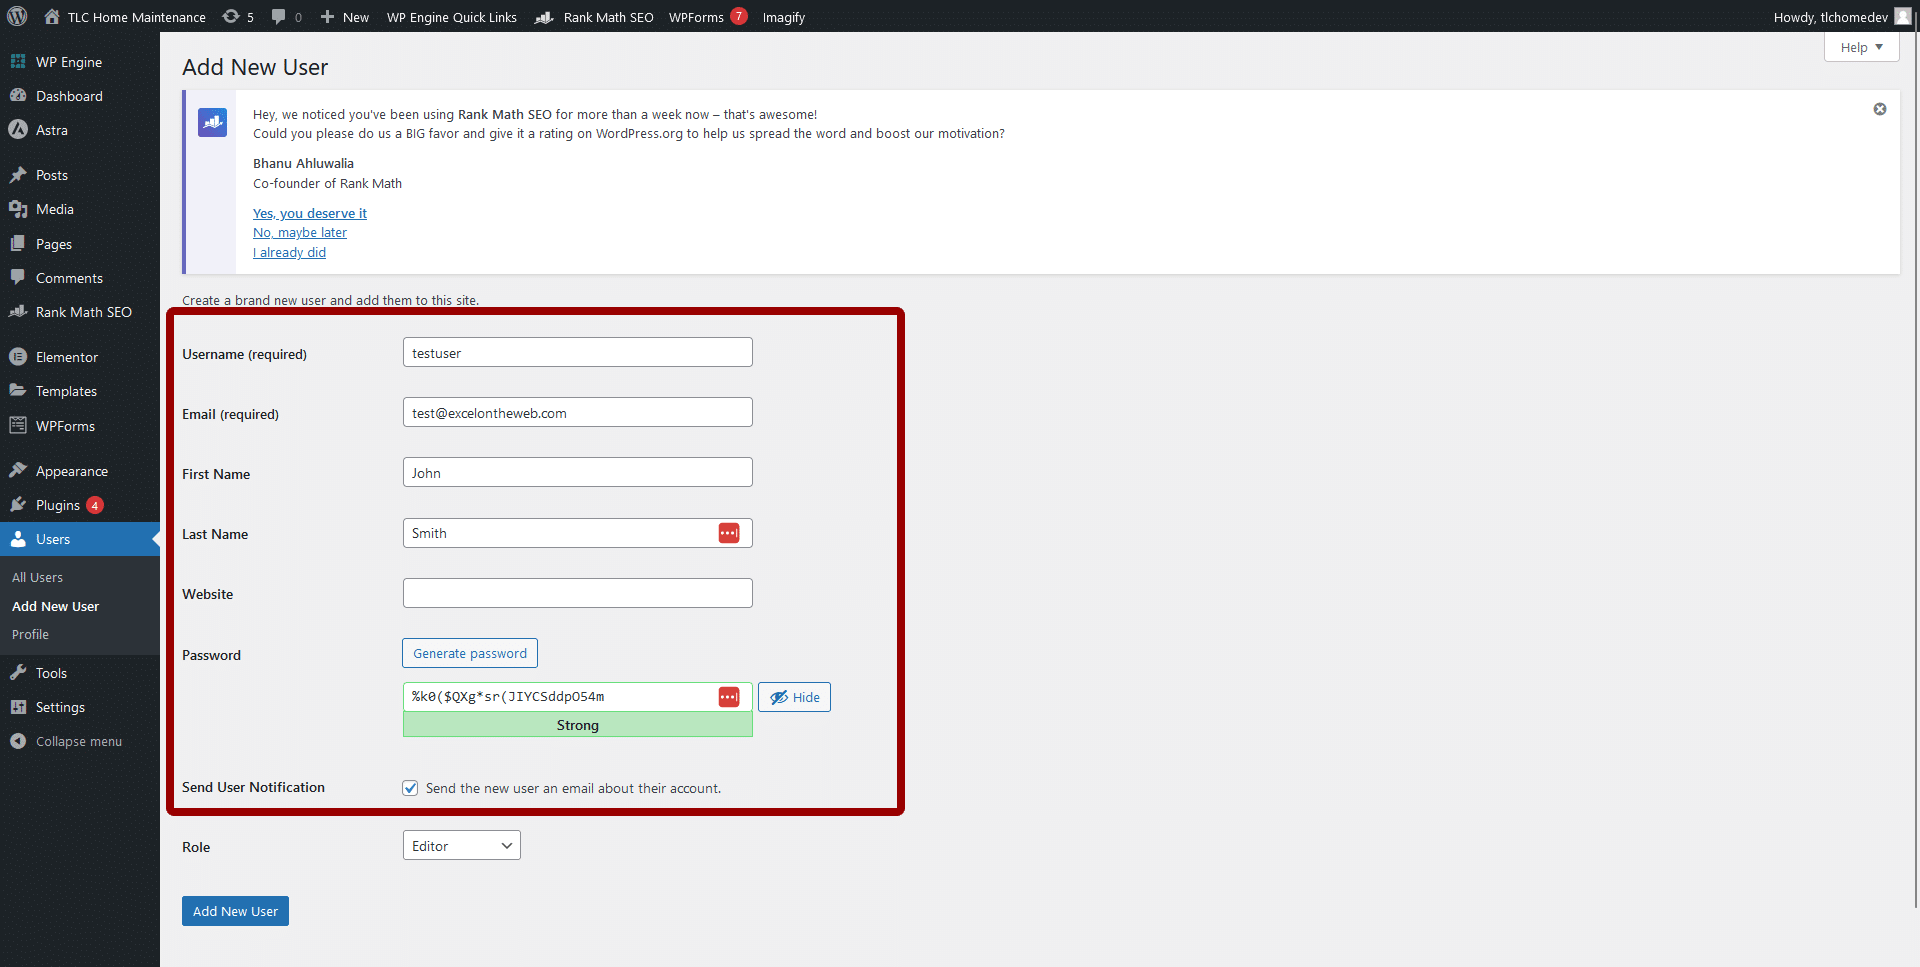
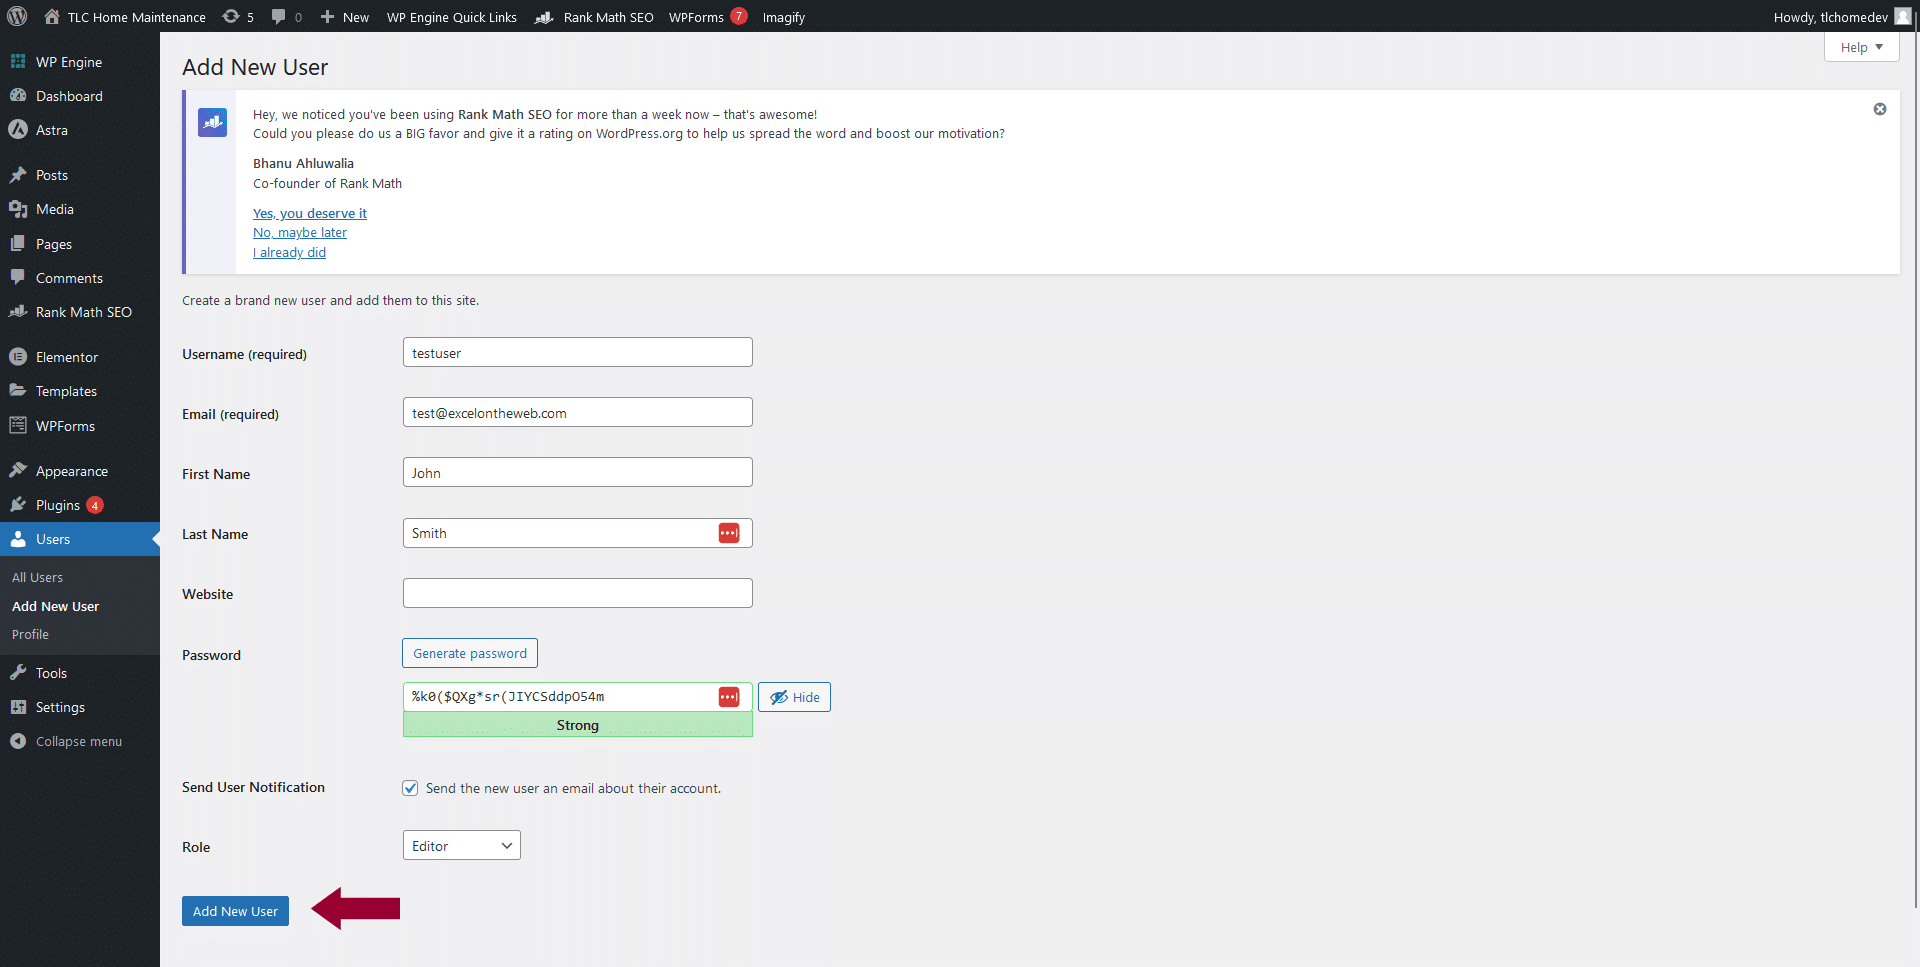
Step 4: Assigning the Role
Select the appropriate role for the new user from the dropdown menu. Remember our office roles? Choose wisely based on what access and capabilities they should have.
Step 5: Adding the User
Step 6: Confirmation and Follow-Up
Adding a New User Through the Database
Why Add Users Through the Database?
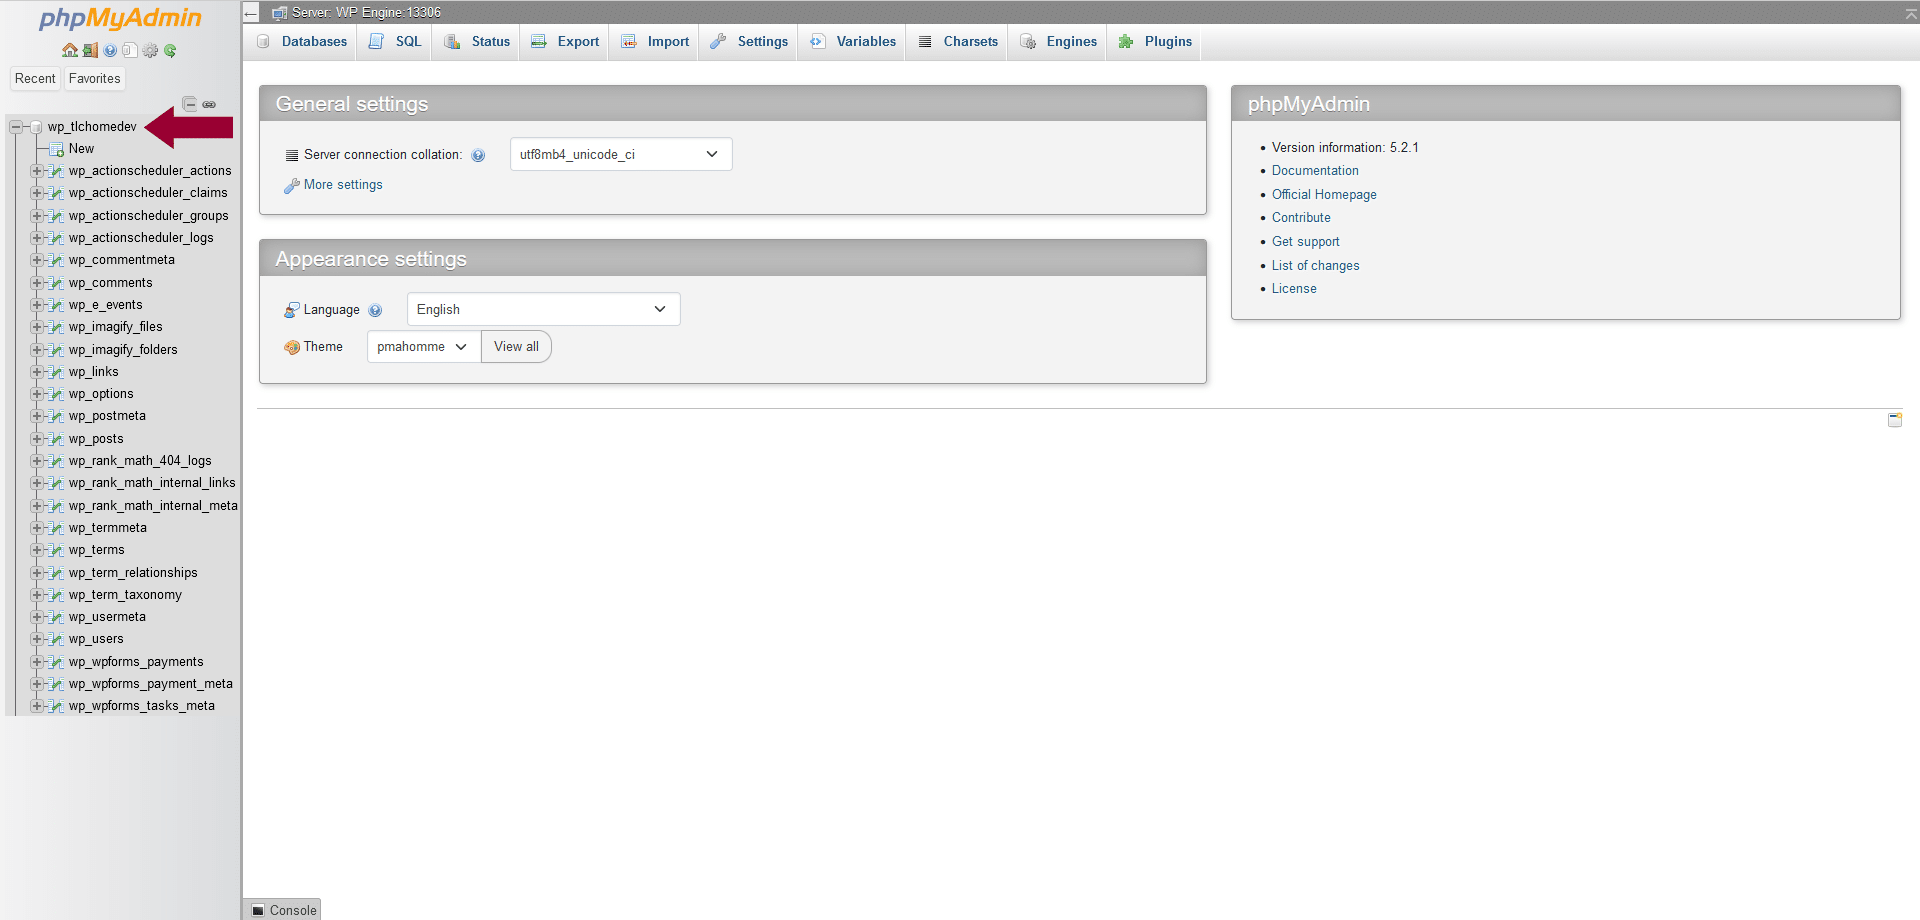
Step 1: Accessing Your Database
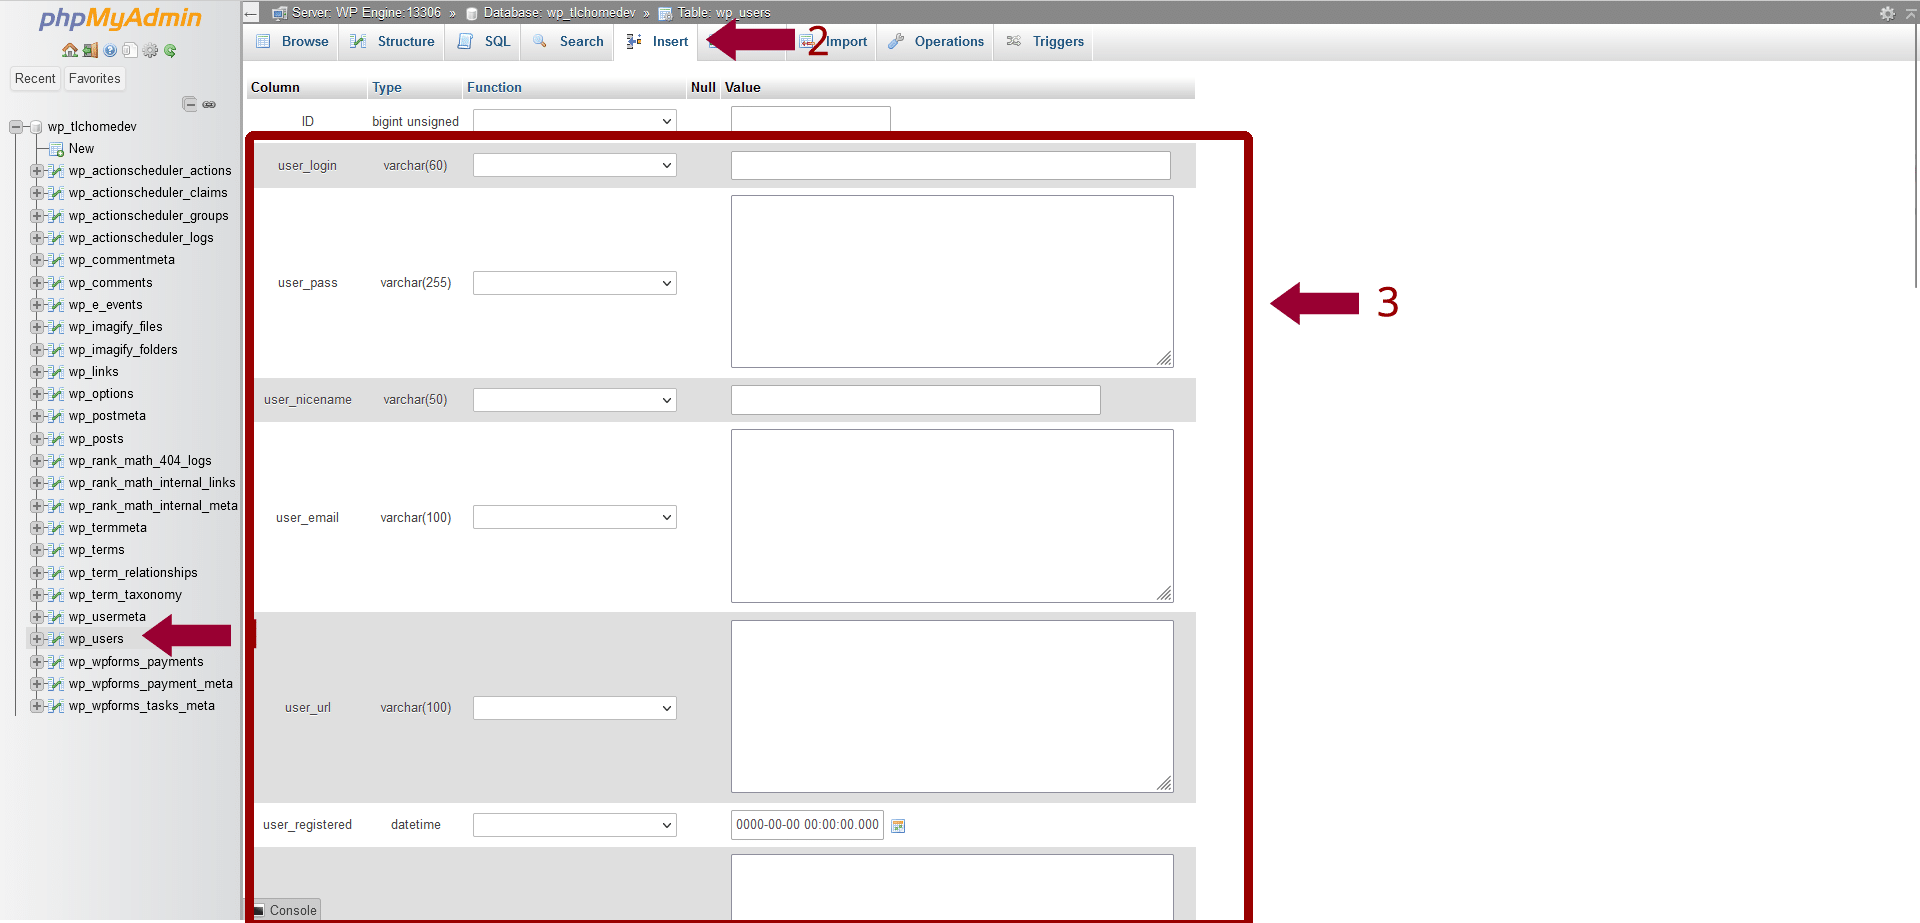
Step 2: Inserting a New User
Look for the table ‘wp_users’ in your WordPress database and click on it. Then, click on the ‘Insert’ tab at the top. Here, you’ll input the new user’s details:
- user_login: The new user’s username.
- user_pass: Their password, encrypted with MD5 hash.
- user_nicename: A URL-friendly version of the username.
- user_email: The user’s email address.
- user_registered: The date and time of registration.
- user_status: Set this to 0.
- display_name: The user’s display name.
Step 3: Assigning a Role
After adding the user details, you need to assign them a role. Go to the ‘wp_usermeta’ table and insert two new rows:
- In the first row, set ‘user_id’ to the ID of the user you just created, ‘meta_key’ to ‘wp_capabilities’, and ‘meta_value’ to the role (like ‘a:1:{s:13:”administrator”;b:1;}’).
- In the second row, set ‘user_id’ as before, ‘meta_key’ to ‘wp_user_level’, and ‘meta_value’ to the corresponding level (like 10 for an administrator).
Step 4: Finalizing the Addition
Adding a New User Programmatically
Why Add Users Programmatically?
Step 1: Understanding the Code
WordPress provides a function called wp_create_user(), which is used for adding new users. This function requires three parameters: username, password, and email. It’s a straightforward, powerful tool that does most of the heavy lifting for you.
Step 2: Writing the Code
function add_new_user() {
    $username = 'newuser';
    $password = 'password';
    $email = '[email protected]';

    if ( !username_exists( $username ) && !email_exists( $email ) ) {
        wp_create_user( $username, $password, $email );
    }
}
add_action( 'init', 'add_new_user' );
Step 3: Customizing User Roles and Information
You can customize this function to assign specific roles or add user metadata. The wp_insert_user() function offers more flexibility for such customizations.
Step 4: Implementing and Testing
After adding your code, test it carefully to ensure it works as expected. Always back up your site before making changes to the code.
Adding a new user with your code is a powerful technique that can save time and open up new possibilities for user management. It’s a testament to the flexibility and extensibility of WordPress as a platform.
Customizing User Settings
After adding new users to your WordPress site, the next important step is customizing their settings. This ensures they have the appropriate access and tools for their role. In the WordPress dashboard, you can tailor various user profile aspects to fit their specific needs and responsibilities.
To customize user settings, head to the ‘Users’ section and select the user you wish to edit. Here’s what you can adjust:
Personal Information
You can update names, contact information, and biographical details. This feature is especially useful for authors or contributors who engage with your audience.
Role Assignment
Password Resets
Display Settings
Customizing these settings is essential for the smooth operation of your site. It ensures that each user has exactly what they need to contribute effectively, enhancing security and productivity on your WordPress site.
By carefully managing these settings, you create an organized and secure environment that empowers users to perform at their best on your WordPress site.
Best Practices for User Management
Regular Audits
Appropriate Role Assignment
Strong Password Policies
User Training
Backup and Recovery Plans
Following these practices ensures that your WordPress site remains secure, efficient, and user-friendly. Good user management protects your site and enhances your team’s overall productivity and performance.
Troubleshooting Common Issues
Managing users on your WordPress site might encounter some common issues. Preparing to troubleshoot these problems efficiently is fundamental to maintaining a smooth user experience. Here are some typical challenges and how to resolve them:
Issue 1: Unable to Add New Users
Issue 2: Lost User Passwords
Issue 3: Role Restrictions
Issue 4: User Cannot Log In
Issue 5: Slow User Interface for Some Users
As we wrap up our guide on creating and managing users in WordPress, you might wonder, ‘How does effective user management impact my website?’ The answer is simple yet significant: Efficient user management is the backbone of a secure, organized, and smoothly functioning website.
Making everyone an Administrator can spell disaster for your website’s security. It’s like giving every employee a master key to your entire office – risky and unnecessary. Instead, assigning appropriate roles and permissions ensures that each team member has just the right level of access. This safeguards your site against potential security breaches, streamlines workflow, and maintains order.
In conclusion, remember that the power of WordPress user management lies in its ability to tailor access according to the role, keeping your site secure, efficient, and well-organized. By adhering to these principles, you’ll ensure your WordPress site remains a robust and reliable asset for your business.