How to Redesign Your Website Without Losing SEO Ranking
Article
Want To Excel on the Web?
Are you thinking about sprucing up your website? Going for a new look is great, but let’s chat about how this can affect your site’s SEO. A redesign is more than just a fresh coat of paint – it can shake up your site’s structure and content, which are big deals for SEO.
Imagine you’re rearranging a well-organized room. If you move things around without a plan, you might end up with a bit of a mess. It’s the same with your website. Changing the layout or updating your content without thinking about SEO could confuse search engines and visitors alike.
But hey, it’s not all cautionary tales. A redesign can actually boost your SEO if you focus on making your site more user-friendly. Search engines love sites that people find easy to use and stay on longer. Just remember, while you’re giving your website that new, snazzy look, keep an eye on how these changes play with your SEO. If done right, you can end up with a site that looks great and continues to rank well, too.
Must-Have Digital Marketing Apps
Making Your List
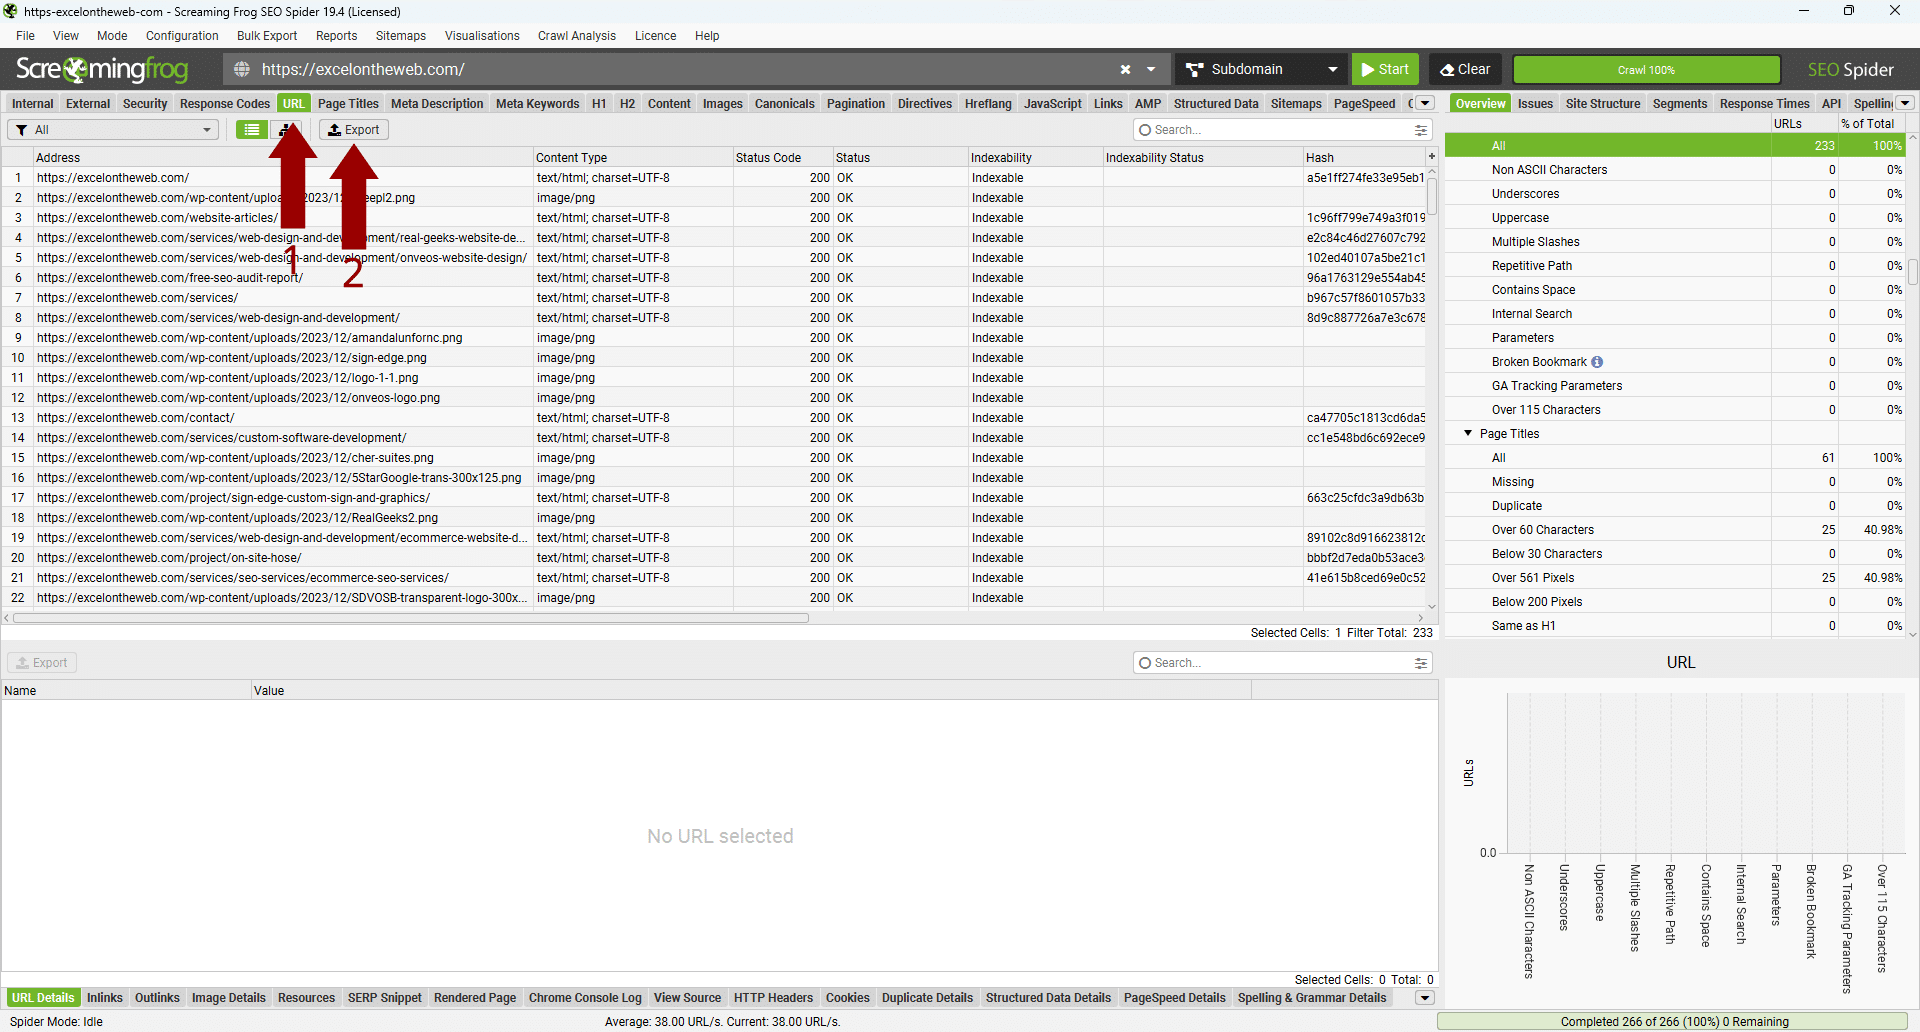
When prepping for a website redesign, you will need to make sure that your current page structure carries over to your new site. Performing a Pre-Redesign SEO Audit gives you a list of URLs to check once you are done to make sure nothing changes. Here’s how you can get a comprehensive list of URLs for your website:
1. Use a Website Crawler
Steps to Crawl Website:
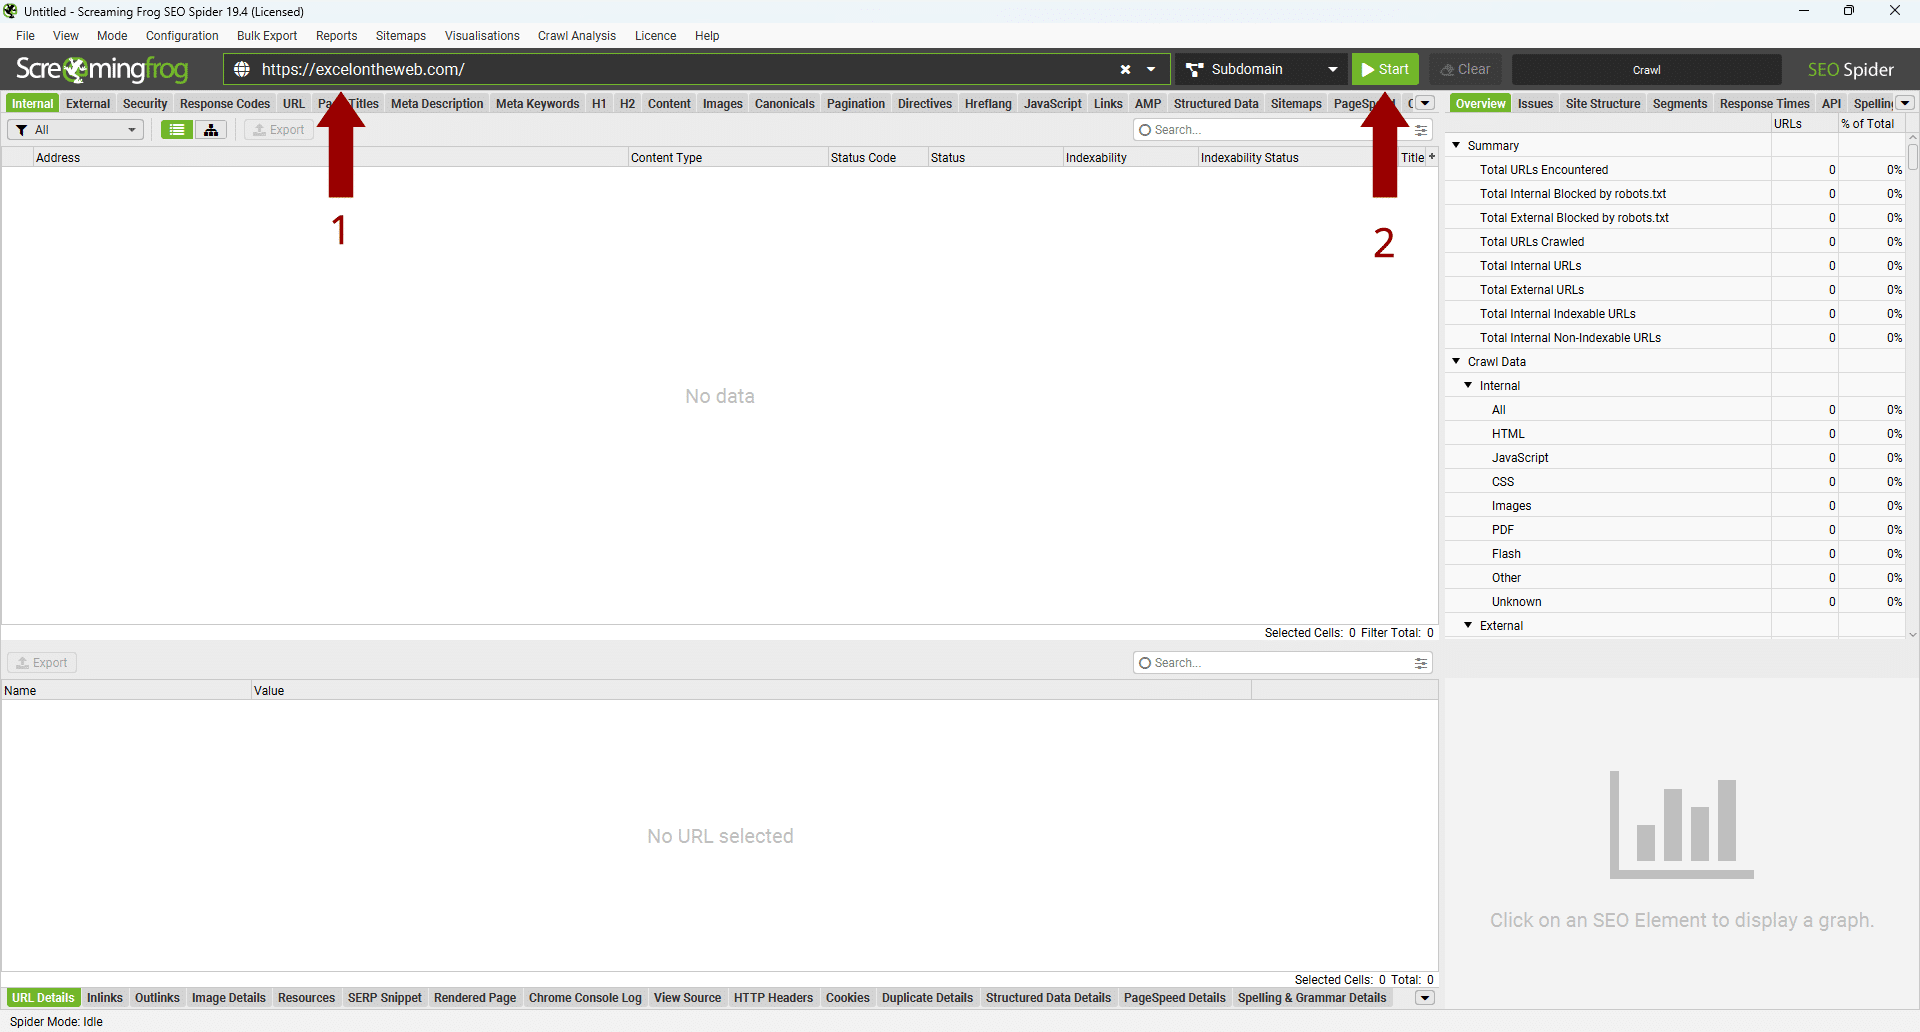
1. Download and install Screaming Frog SEO Spider.
2. Enter your website’s URL and let the tool crawl your entire site.
2. Check Your Sitemap
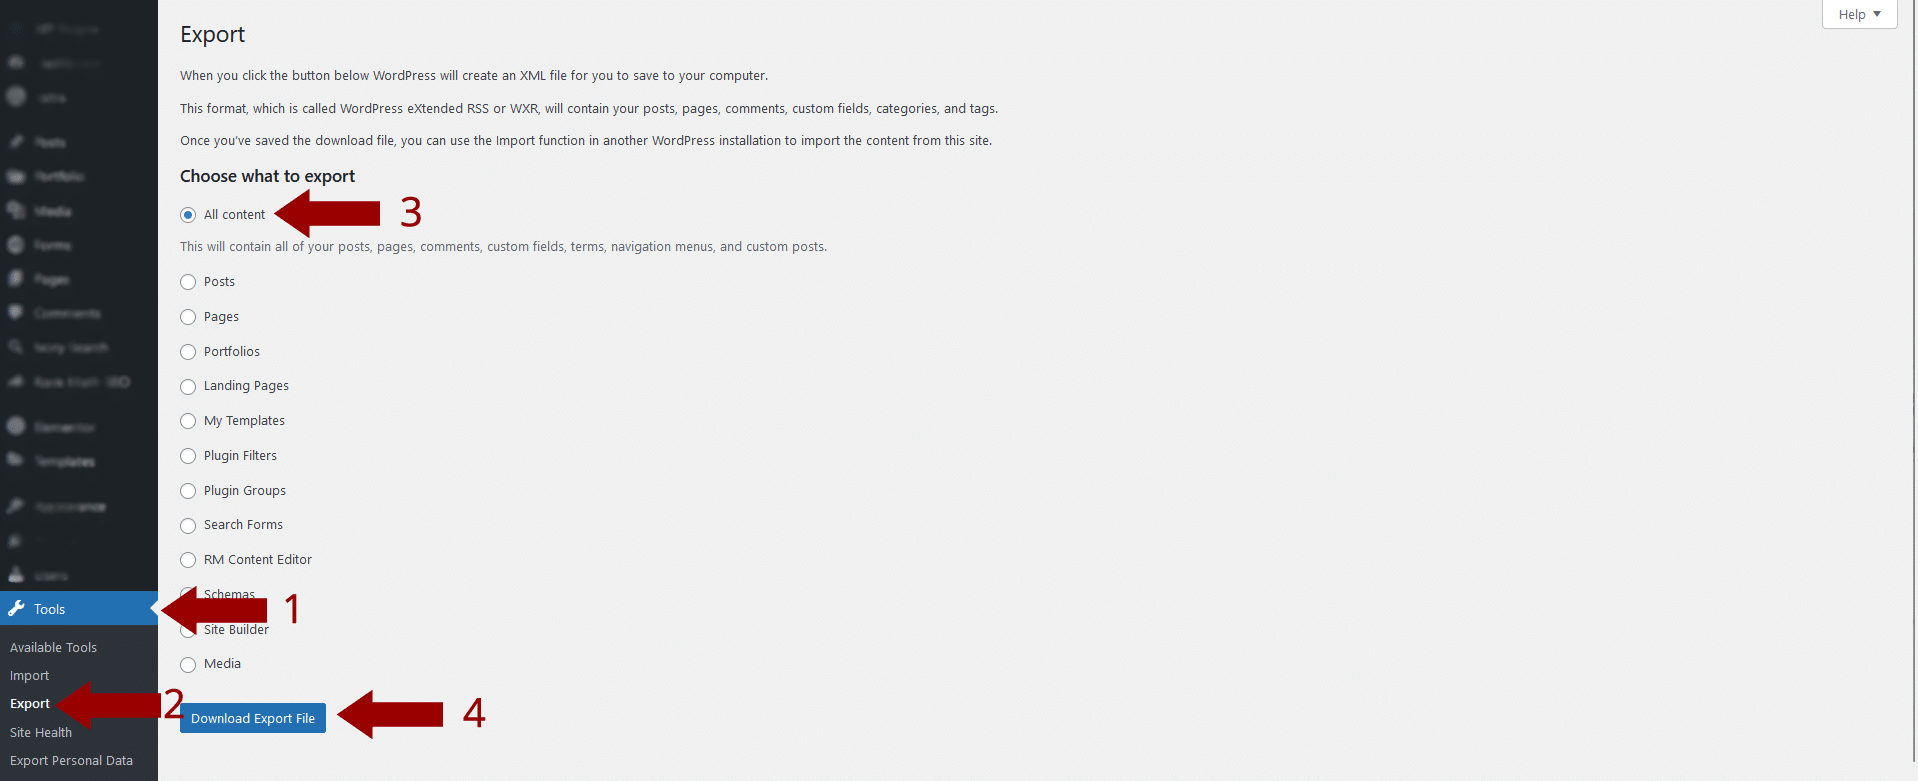
3. Export from CMS
Steps to Export from WordPress:
1. Go to ‘Tools’ and then ‘Export’. Choose to export ‘All content’, including posts, pages, comments, custom fields, categories, and tags.
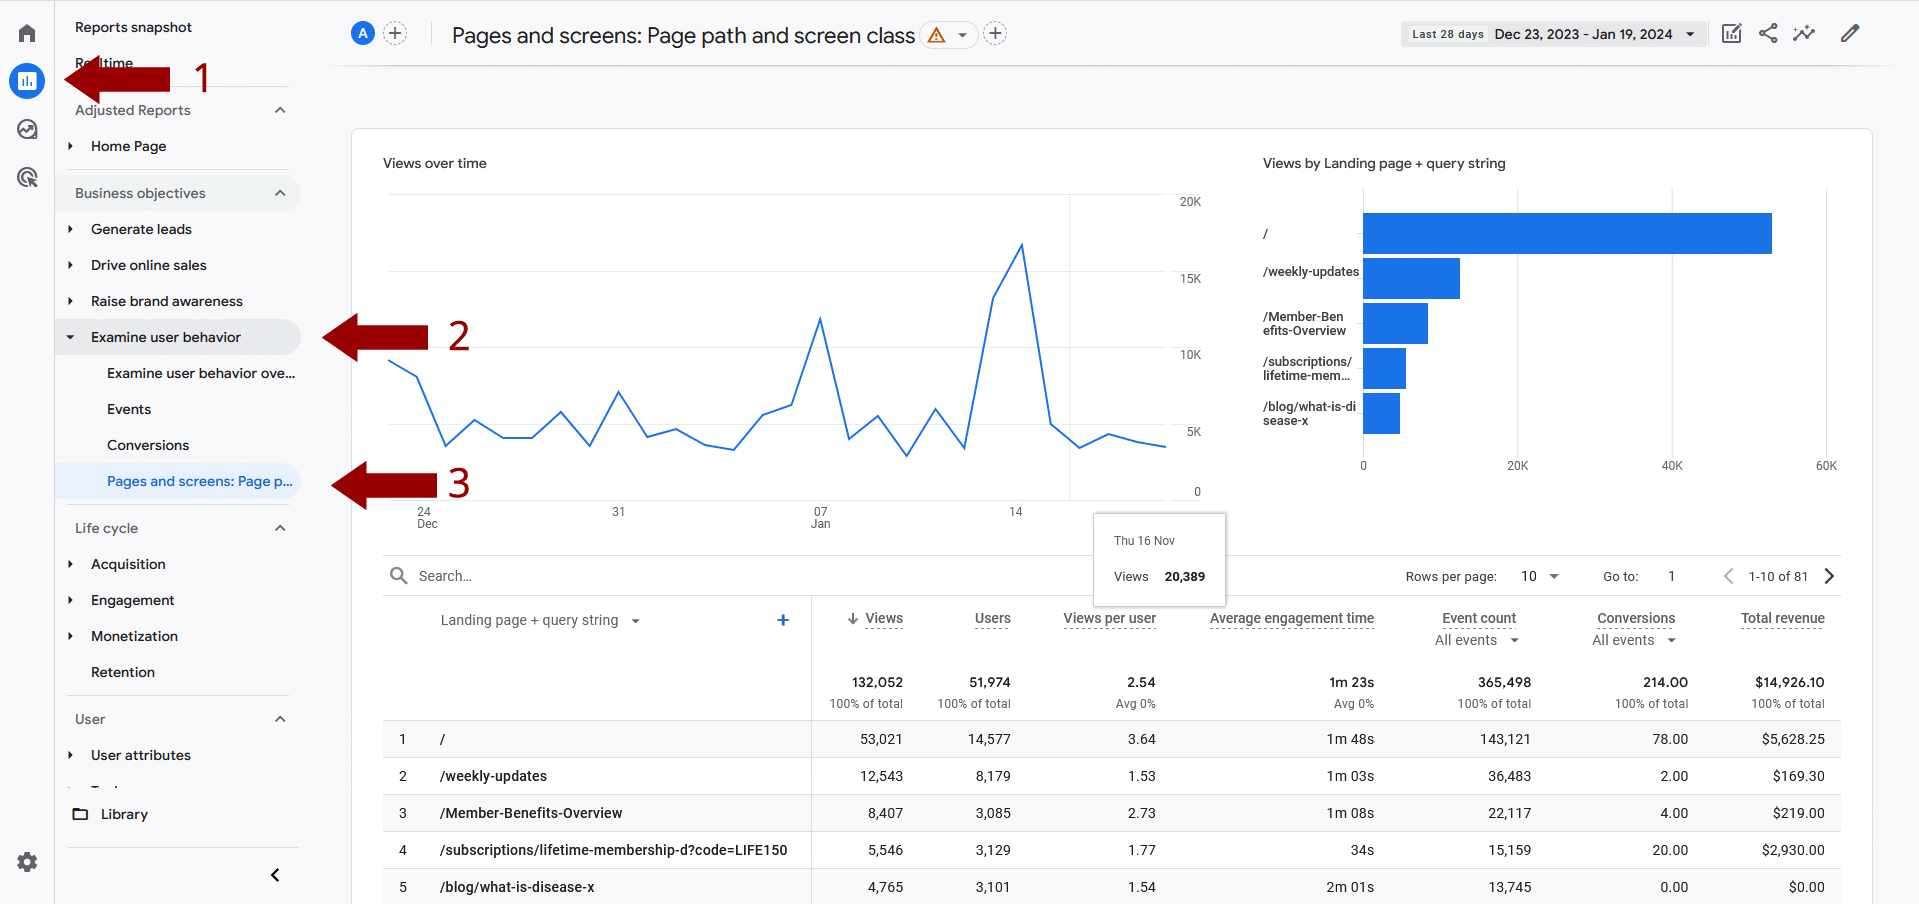
4. Use Google Analytics
Navigate to the ‘Behavior’ section in Google Analytics, where you can view the ‘Pages And Screens’ report. This report shows all the pages that have been visited and can be exported as a list of URLs.
5. Leverage Google Search Console
Google Search Console provides a ‘Coverage’ report that lists all the URLs it has indexed for your site. This can be a comprehensive source for your current site structure.
Steps to Export from Google Search Console:
1. Access Google Search Console and select your property (website).
2. Go to ‘Pages’ under the ‘Indexing’ section.
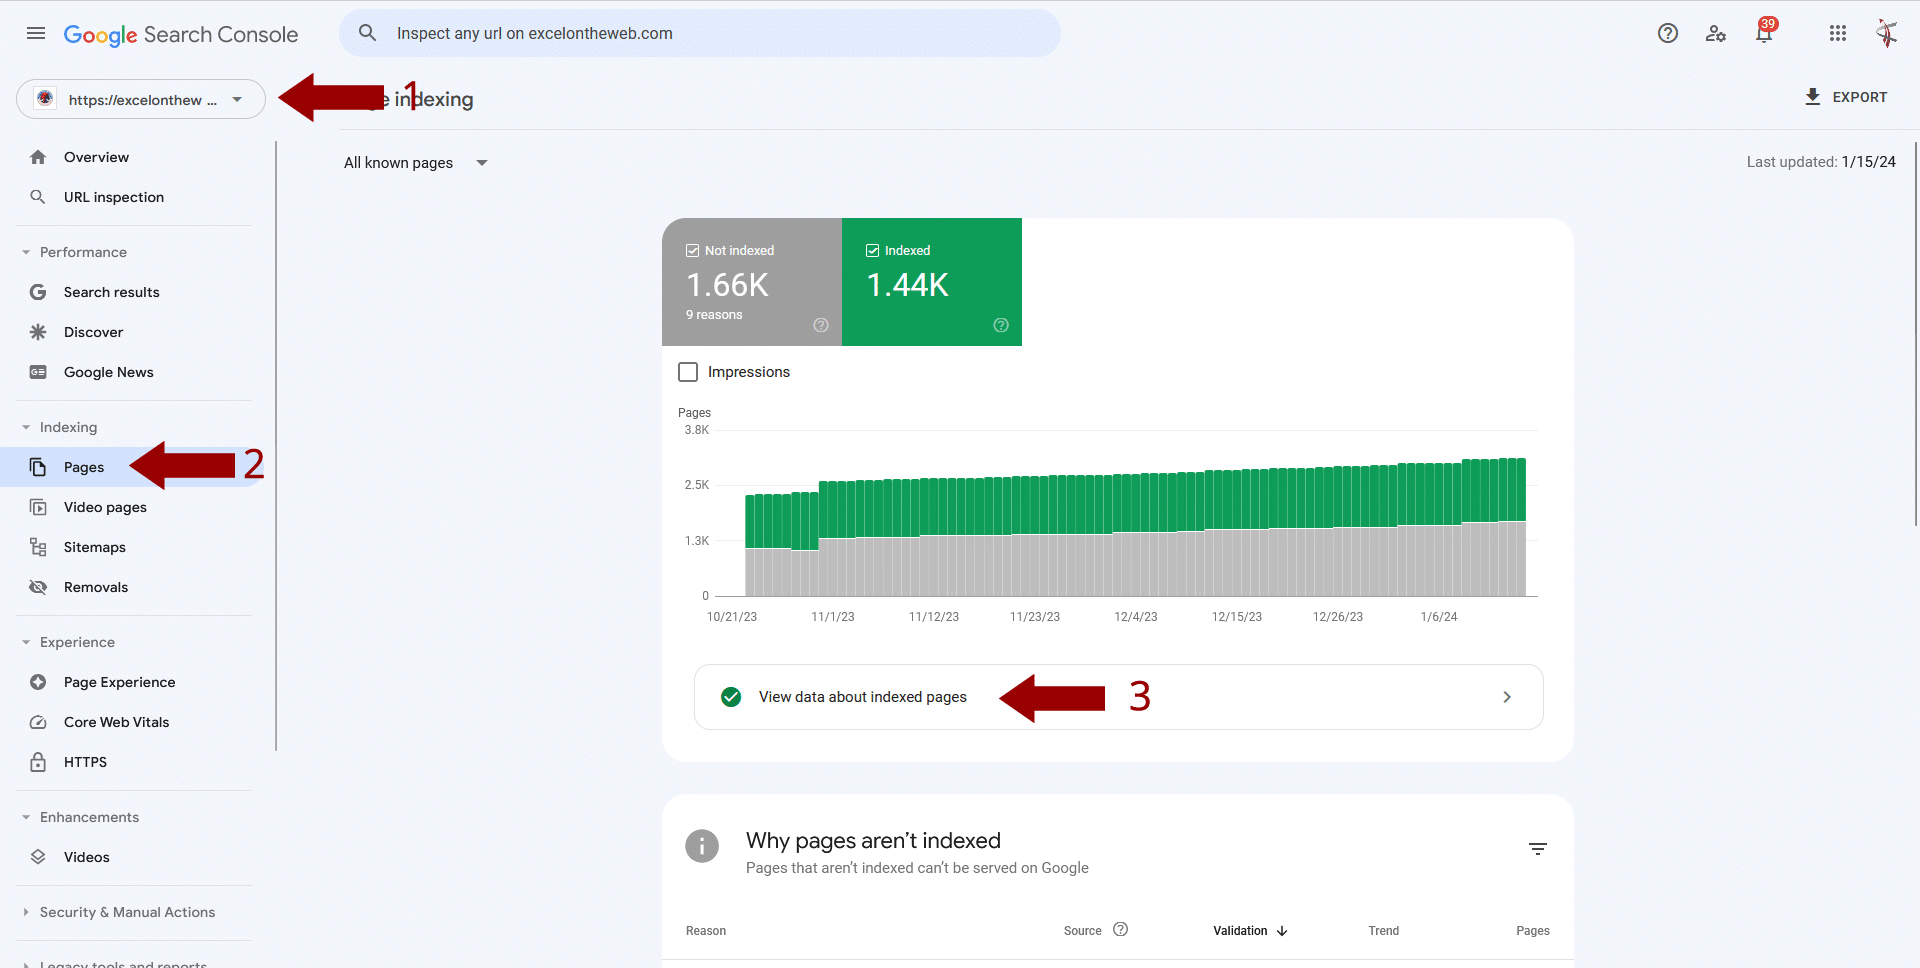
3. Here, you’ll find a list of all indexed URLs. You can export this data to get a thorough list of what Google has indexed from your site.

Build Your New Website on a Staging Site
After thoroughly assessing your current website, the next exciting phase is to start crafting your new vision. You should never build a new website on the same domain as your current one; instead, you should use a staging site.
Creating a staging site gives you a place to experiment with your website’s redesign without the public or search engines seeing the work in progress. This is important so you can ensure that your live site remains unaffected, and your SEO rankings are preserved while you perfect the new design.
Hosts like WPEngine provide an extra hosting option for a staging site included in their plans. Make sure that you keep the search engines from finding your new site before it’s ready. You can lock your staging site down by:
1. Add a password that must be entered before viewing the site.
2. Enter the following code into your robots.txt file
User-agent: *
Disallow: /
<meta name="robots" content="noindex">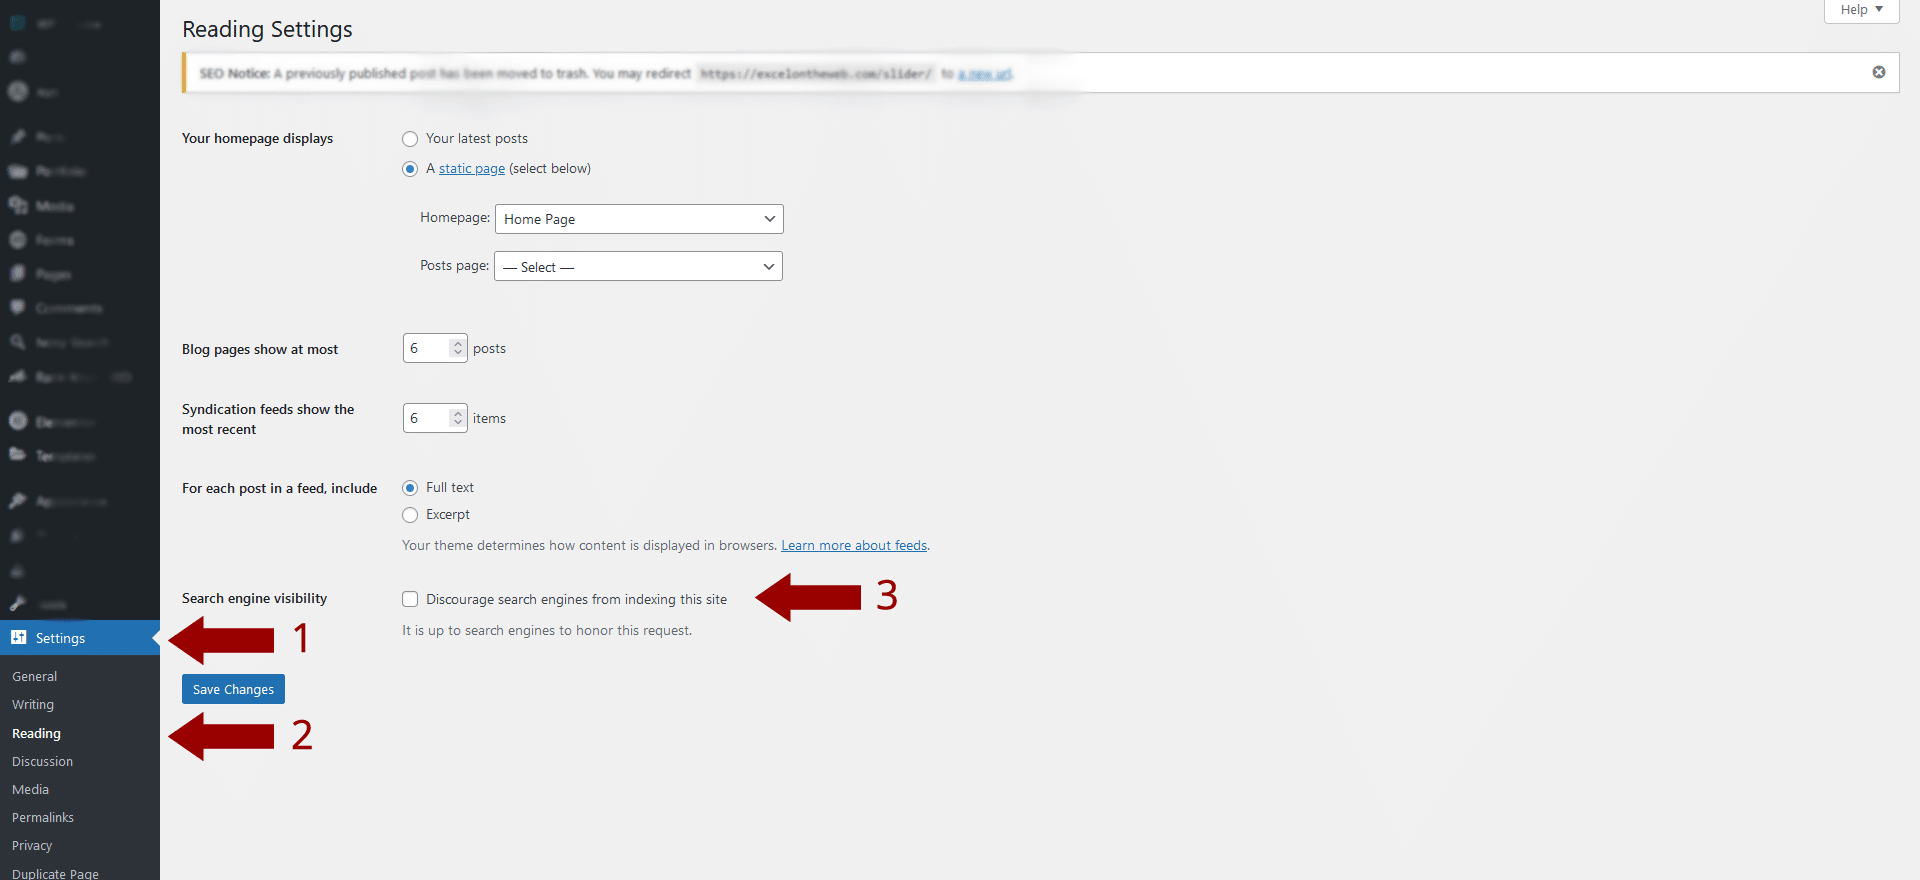
Checking it Twice
After spending hours on your website’s new look, it’s time to make sure that these changes haven’t derailed your SEO efforts.
If your redesign was only a “reskinning” of your existing pages, you won’t have much to audit. However, if you merge content from different pages, alter the URL structure, create new pages, or remove unneeded pages, you will need to perform a much deeper audit.
Run your new site through Screaming Frog and compare the URLs of all your current pages to make sure everything has stayed the same. Check any pages currently ranking well and make sure that the Titles, H1 tag and Meta Descriptions have not changed.
The paid version of Screaming Frog will also catch spelling and grammar issues on your site. Nothing is more embarrassing than having a beautiful new website with a spelling mistake on your home page.
Set Up 301 Redirects
If you must change some URLs or remove pages from your website, it is important to set up 301 redirects to the new URL.
A 301 redirect is a permanent redirect from one URL to another. This allows you to keep the value of incoming links from other websites and search engines while directing users and bots to the correct page on your website.
To set up a 301 redirect, you will need access to your website’s server or hosting account. There are several methods for setting up redirects, but the most common method is through the .htaccess file.
Setting up a 301 redirect using the .htaccess file
1. Log into your server or hosting account’s control panel or go connect using SFTP.
2. Locate and open the .htaccess file in the root directory of your website.
3. Add the following code to the top of your .htaccess file:
Redirect 301 /old-page.html http://www.example.com/new-page.htmlReplace “old-page.html” with the old page’s URL and “http://www.example.com/new-page.html” with the new page’s URL.
4. Save the changes to your .htaccess file and upload it to the server.
Setting up a 301 redirect using cPanel
1. Log into your cPanel account.
2. Navigate to the “Redirects” option under the “Domains” section.
4. Enter the old URL in the “redirects to” field and the new page’s URL in the “redirects to” field.
5. Choose “Permanent (301)” as the type of redirect.
6. Click “Add” to save the changes.
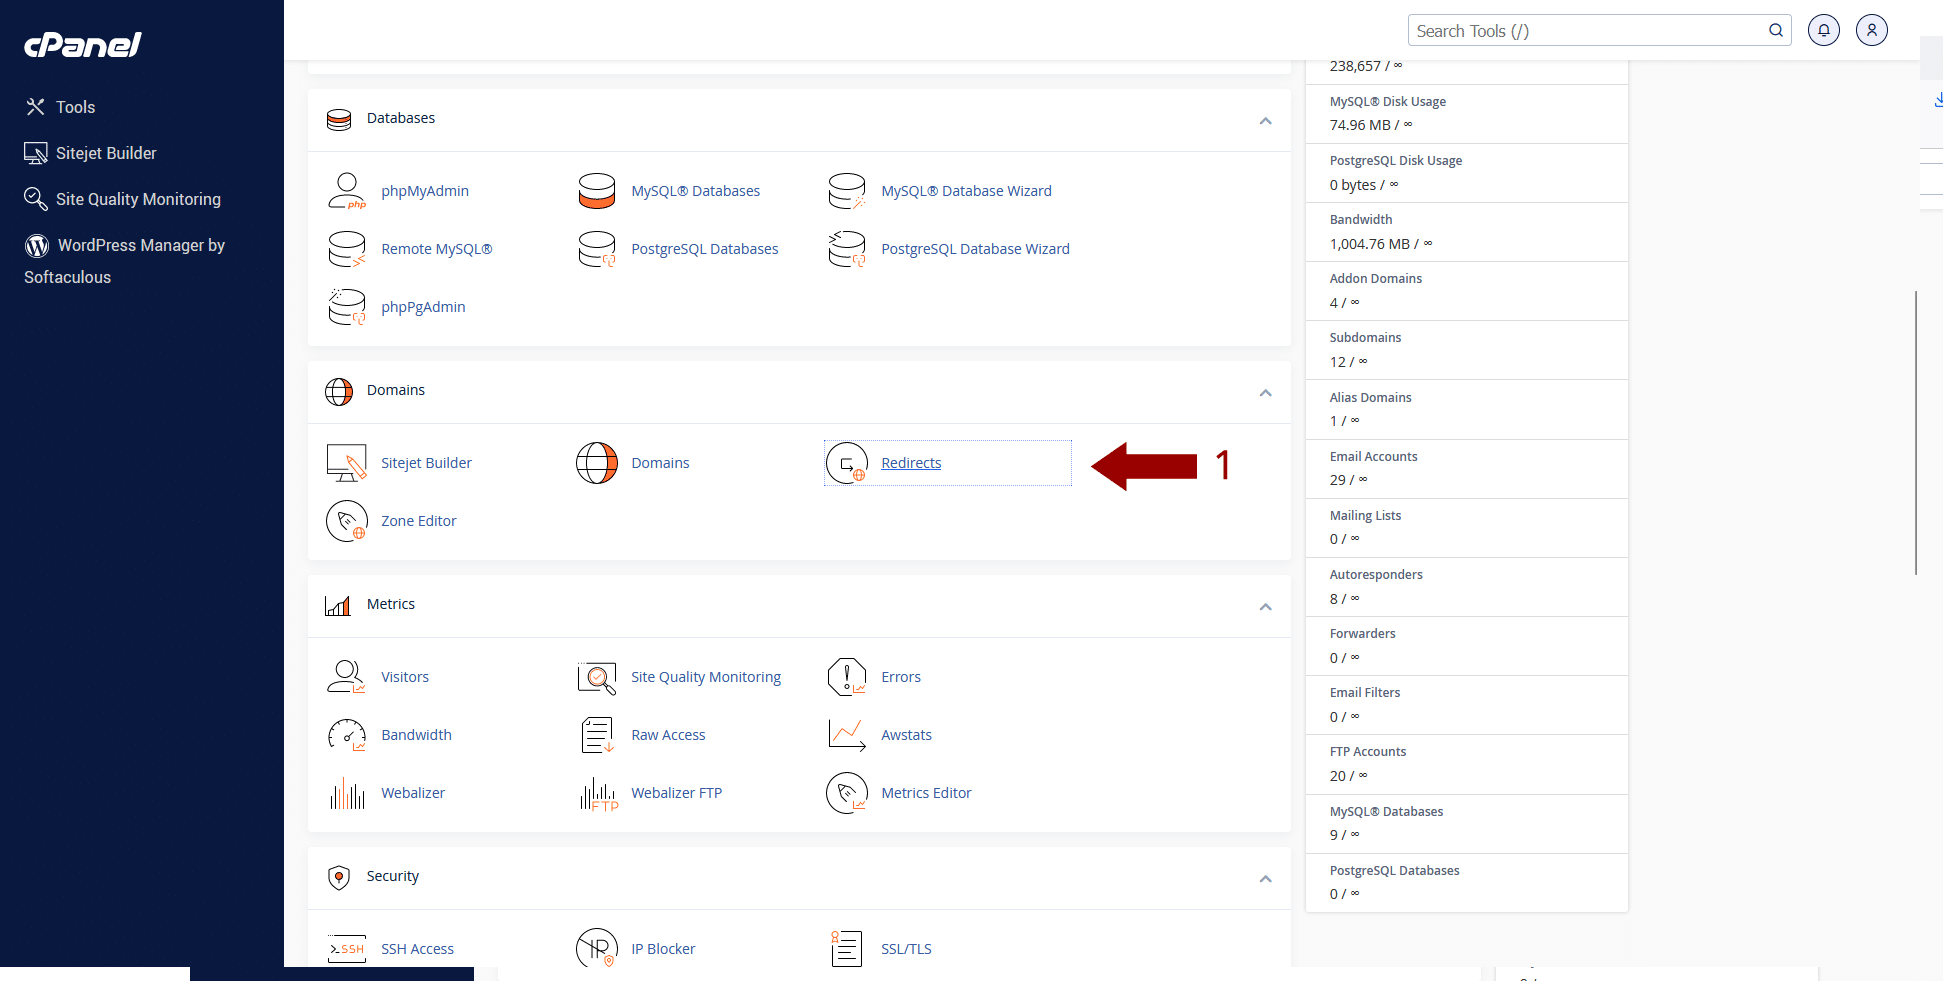
3. Select the domain you want to redirect from.
4. Enter the old URL in the “redirects to” field
5. And the new page’s URL in the “redirects to” field.
6. Choose “Permanent (301)” as the type of redirect.
7. Click “Add” to save the changes.

Setting up a 301 redirect using WordPress
There are many ways to set up 301 redirects using WordPress but we will go over how to use Rank Math which is our favorite SEO plugin.
1. Install and activate the “Rank Math” plugin from the WordPress dashboard.
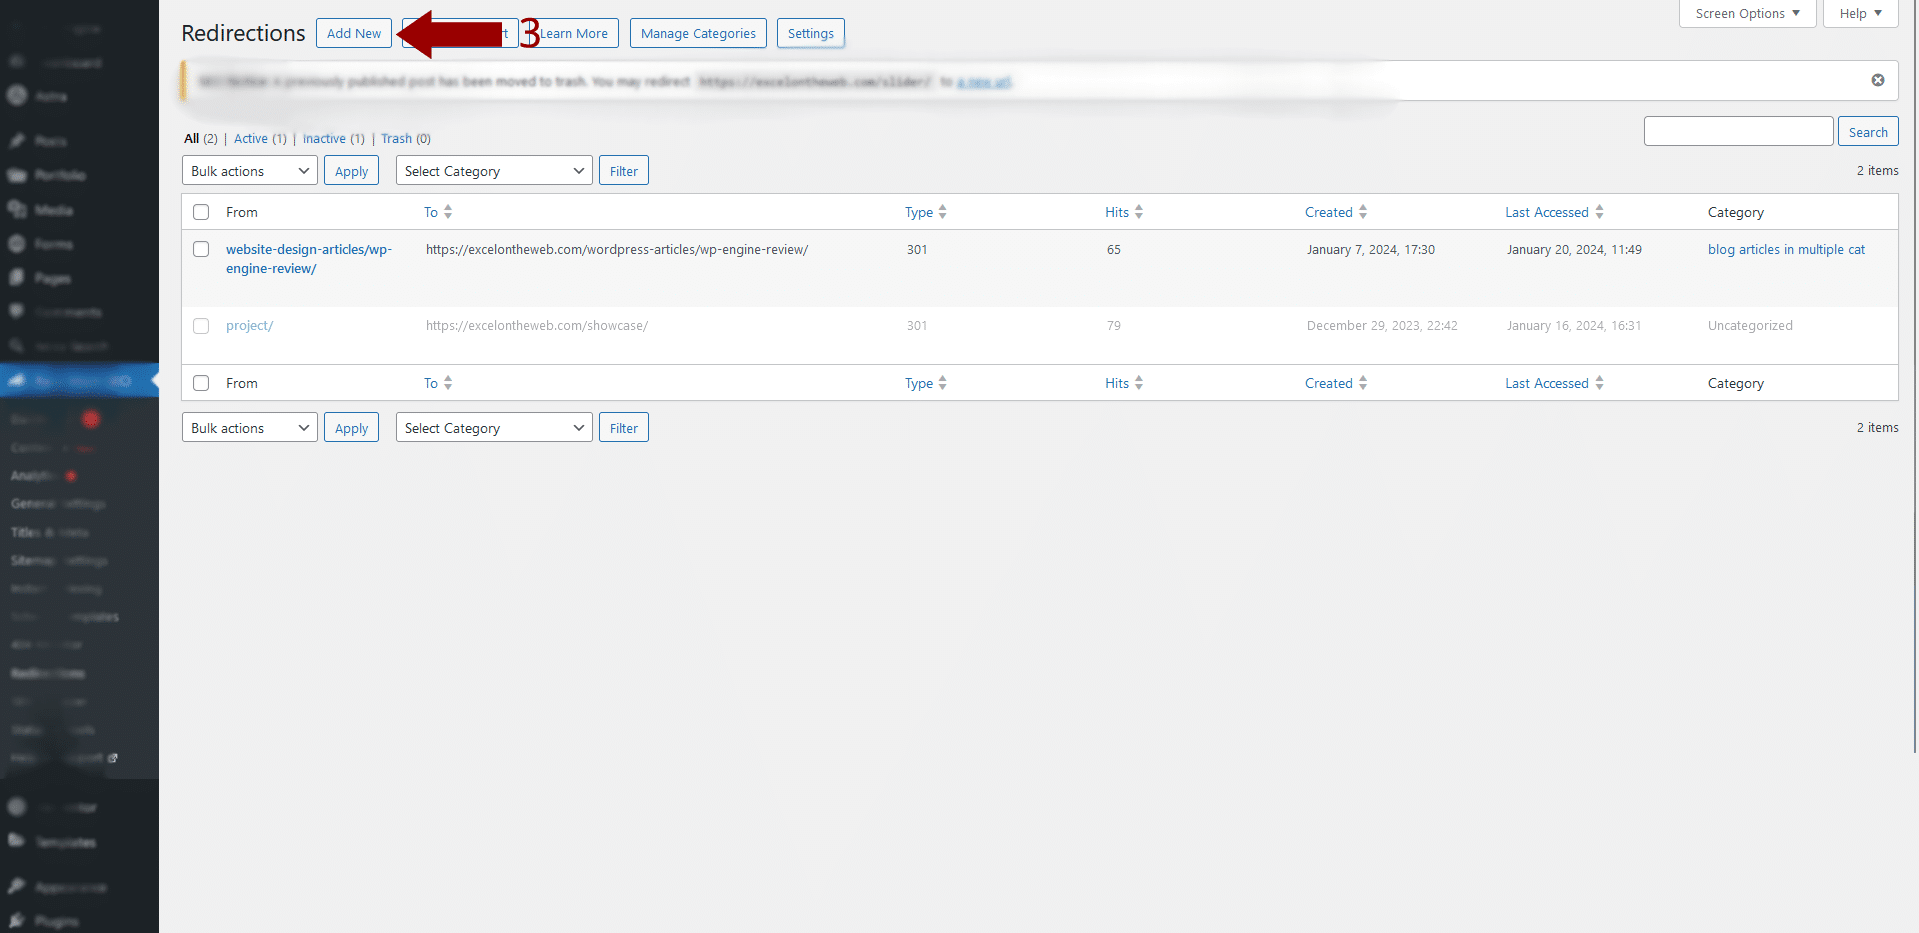
2. Navigate to the “Redirection” option under the “Rank Math SEO” section.

3. Click Add New.
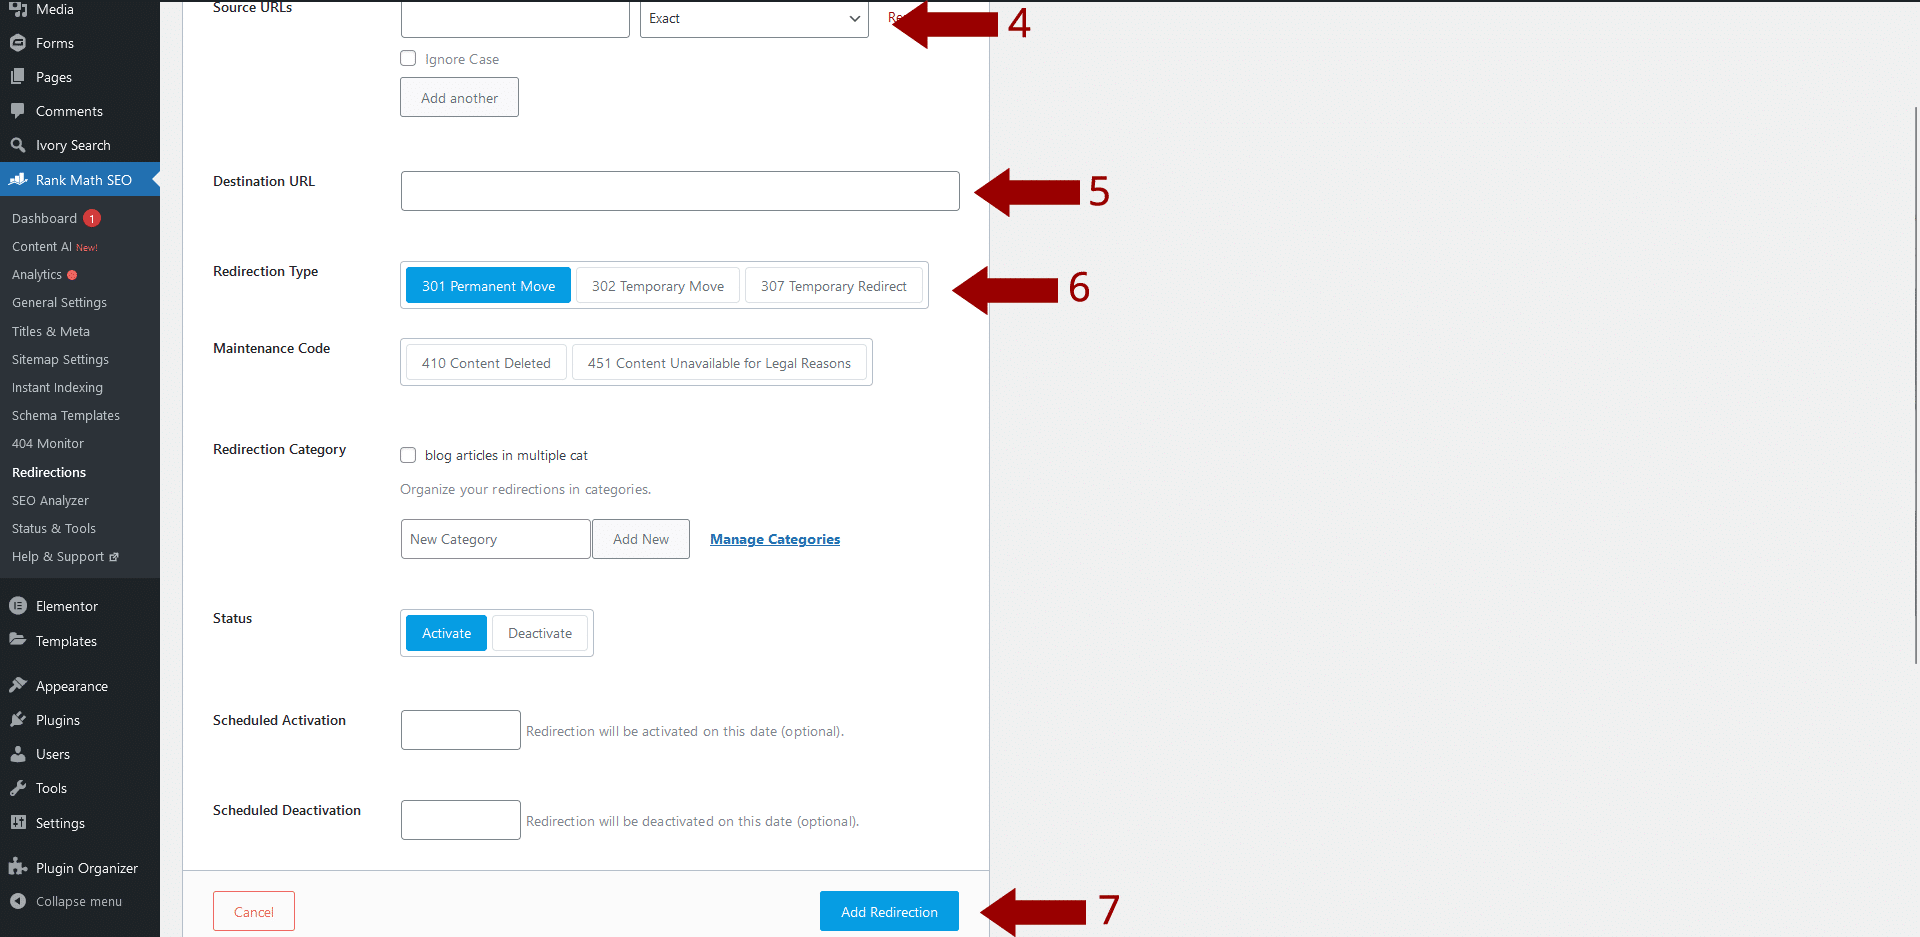
4. Enter the old page’s URL in the “Source URL” field
5. Enter the new page’s URL in the “Destination URL” field.
6. Choose “Permanent (301)” as the type of redirect.
7. Click “Add” to save the changes.
The Big Reveal
After meticulous planning, designing, and testing, the time to unveil your redesigned website has arrived. Before you hit that “Go Live” button, there are a few key things to keep in mind.
Double-check that all content is optimized for SEO, with appropriate keywords, meta tags, and alt texts in place. Scan your site with https://pagespeed.web.dev/ and ensure you have no technical speed issues hindering your new website’s SEO score.
Once you are happy with the results, it’s time to flip the switch and take your new site live. Back up your current site and transfer your staging site to your live environment. If you are using WordPress, the easiest way I have found to do this is with the Migrate Guru plugin.
After your site is live, remove the lockdown functionality you added in step 2. Nothing will kill your SEO more than telling the search engines to no longer crawl your site. It happens all the time, so make sure it does not happen to you.
Checking it Three Times
The song goes “making a list and checking it twice”, but why not check it three times? Are you so sure you did not miss a step that you feel comfortable taking your site live and not double-checking it again? Running Screaming Frog against your site one more time will tell you if there were any issues with the go-live process, like not allowing the search engines to crawl your site. Some Items to check are:
- The 301 redirects you set up are working.
- The site has no 404 errors.
- The only pages you want to be marked No-Index are marked that way.
- All tracking codes are still on the site and working. (Google Analytics, Meta Pixel, etc.)
- Schema.org tags are still implemented.
After you are done, it’s time to open a beer, but just know, the work is not over. Make sure to keep a close eye on your new site after you’ve given it a makeover. Pop into Google Search Console every now and then to see how many of your pages Google’s indexed. Keep tabs on stuff like how many people are checking out your site and remember to watch your search engine rankings like a hawk.
The thing is, if your SEO ranking takes a hit, you want to know ASAP so you can fix it fast. Catching it early means you can bounce back quicker, rather than finding out too late and having a bigger mess to clean up.
So, as long as you’ve got these points on your radar, revamping your site shouldn’t be too scary. Keeping an eye on these details means the whole ‘losing your SEO ranking’ thing becomes more of a little bump in the road rather than a full-on roadblock because you weren’t paying attention.